How to Complete a Form I-9
I9 – The first screen is for the new hire to complete, and it provides the information that would be included in Section 1 of the I-9, that screen reads across the top “Employment Eligibility Verification.” The new hire needs to input their data into the blank data fields presented to them, just as they would writing on the I9 directly.
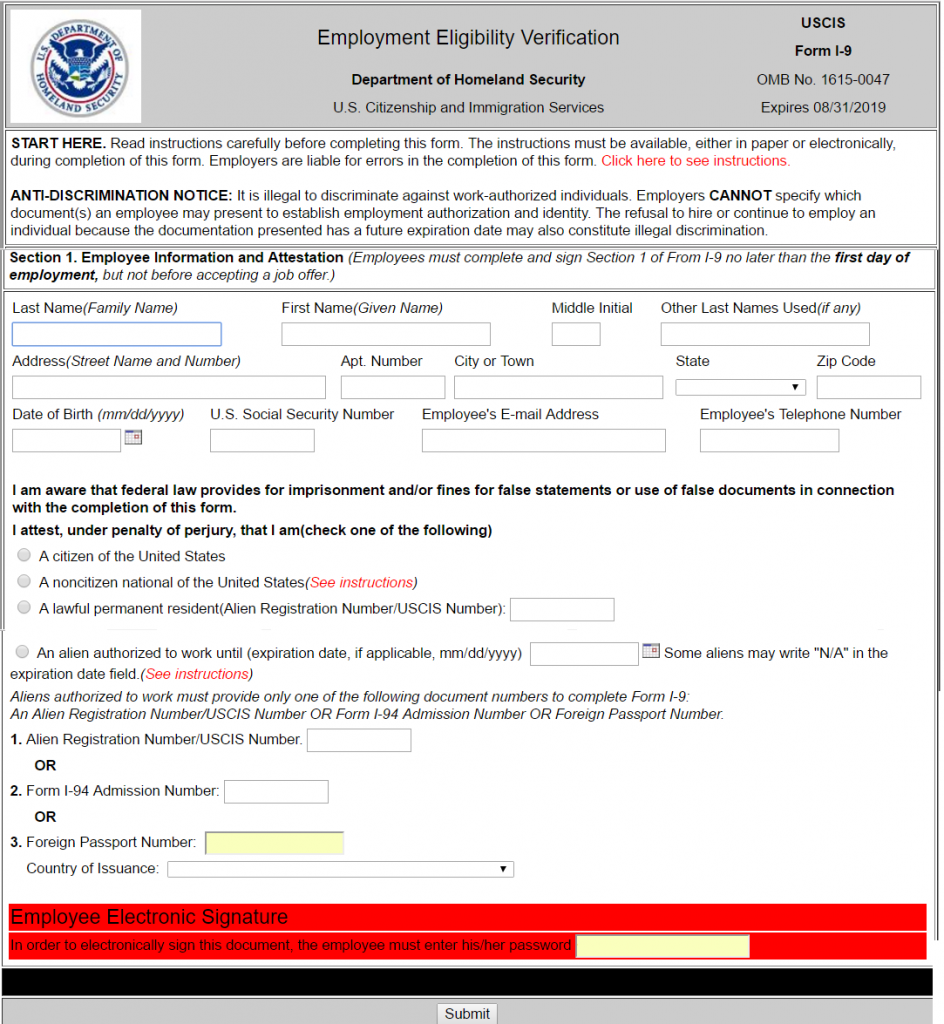
Once the necessary data fields are completed the new hire then enters their password and clicks submit.
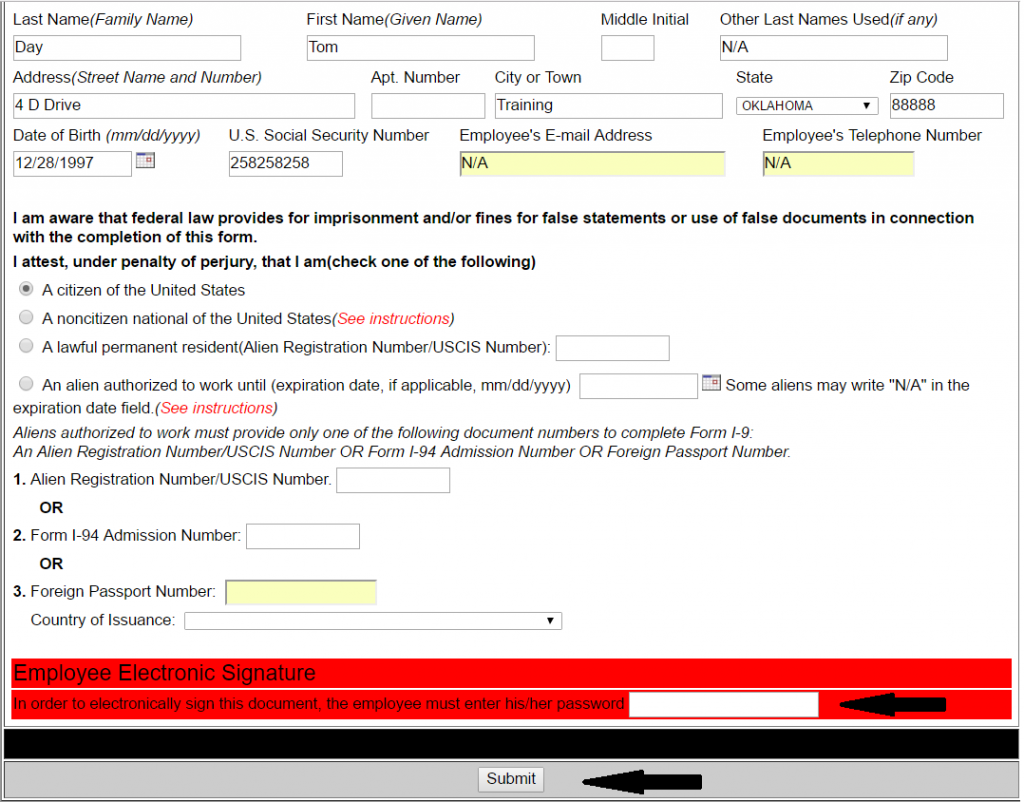
At this point Eight will either move the new hire and employer forward to the next section of the I9, or will provide the new hire with a message notifying them of any additional data fields that need to be completed, and/or notify the new hire if there is a discrepancy between the data they just entered and what currently is on the New Hire task itself. If the New Hire happens to leave the Other Names Used, Email Address, or Telephone Number fields blank a message will instruct the new hire to include N/A in those fields. If the employee enters data differently then what is on the new hire task, they will need to make those changes in order to move forward. If the errant entry is in Section 1 of the I9, then they can correct the error, and re-submit the form.
But, if the errant entry is on the New Hire task itself, they will need to close the window, go back to My Task, open the New Hire task, make the necessary data changes, and then click on Submit to log back into the forms processing portion of Eight. They will then be back to Section 1 of the I9, where the employee will have to input the data into each field.
Once the new hire has successfully completed Section 1, the screen will come up again, just as it has before, and present the employer with the Preparer/Translator portion of the I9.
The screen looks like this:
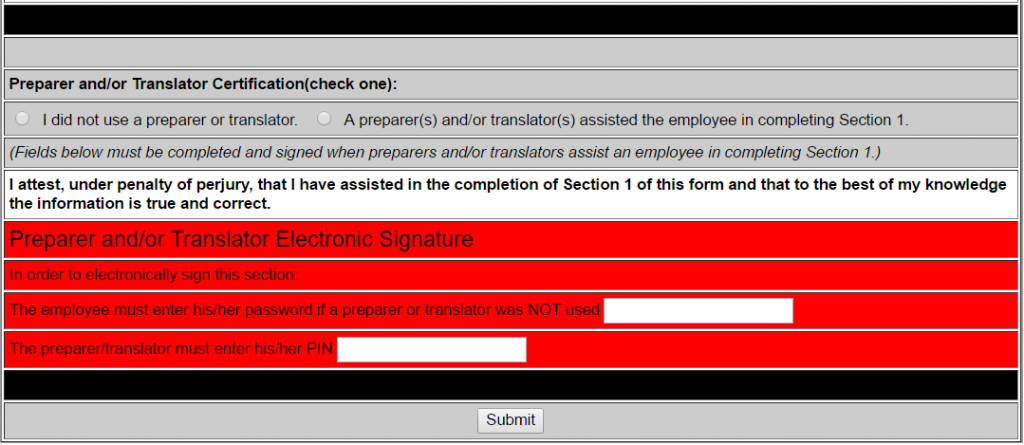
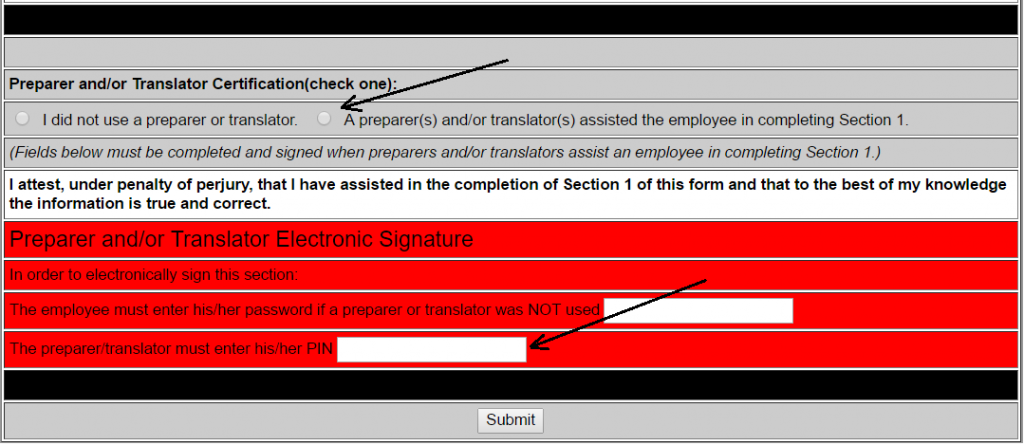
If the employee entered the information into Section 1 without assistance or translation they need to check the radial button to the left of “I did not use a preparer or translator,” enter their password and click Submit as shown below.

If the employee did require assistance preparing Section 1, or needed their employer to translate Section 1 for them; then the manager needs to check the radial button to the left of “A preparer(s) and/or translator(s) assisted the employee in completing Section 1,” then enter their PIN and click the Submit button as shown next.
The next screen you will see will be Section 2 of the I-9 as shown below.
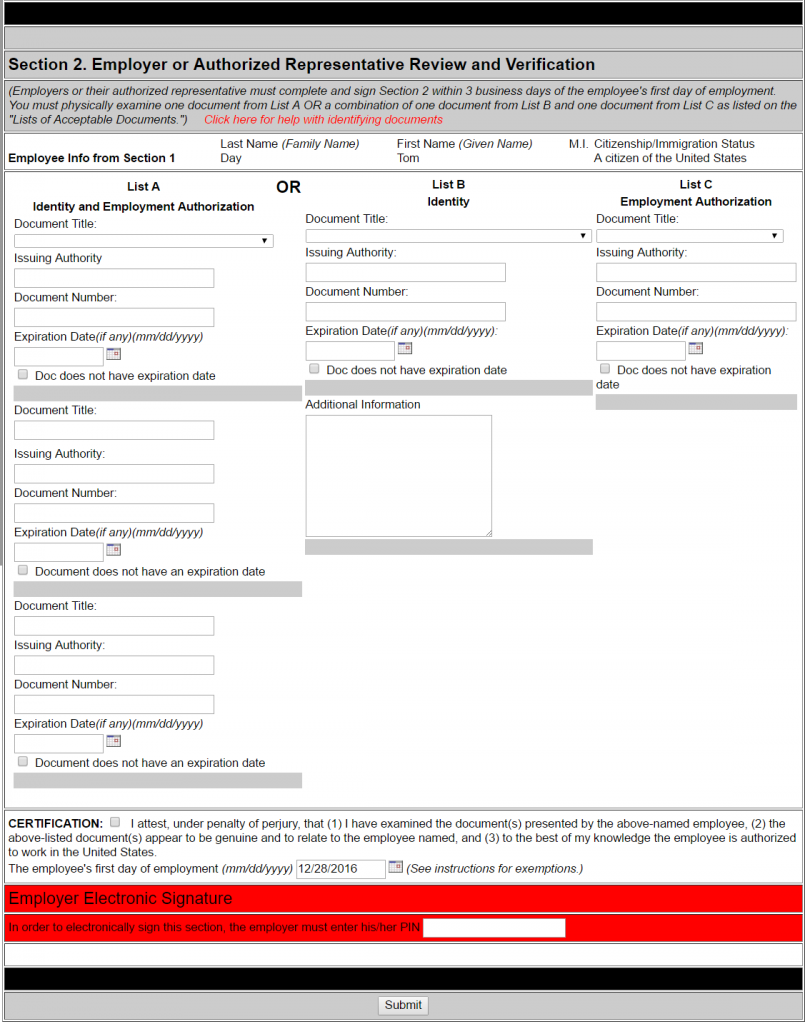
It is here that the manager inputs the List A, B, or C documentation data. It is very important that this information is entered correctly.
• Document – You must select one from the List A drop down or one for List B and one from List C
• Issuing Authority – Enter alpha numeric data only. No special characters
• Document # – This is very important, especially if it is a list A document. Please enter all numbers and/or letters
• Expires – Please select the expiration date if the document has one. Click on the box next to the date field to select a date
The manager will need to select the CERTIFICATION button, enter their PIN, and hit submit. Eight will either move the manager forward and present the I9 in its actual PDF form (if this is the case move forward in the instructions to page 6), or provide the manager feedback. One possible error looks like this:
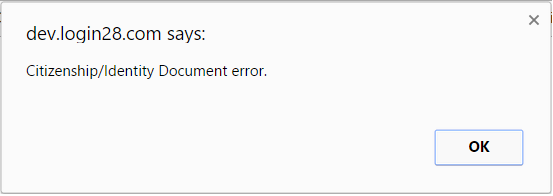
Once the manager clicks the OK button, the screen will then look like this:
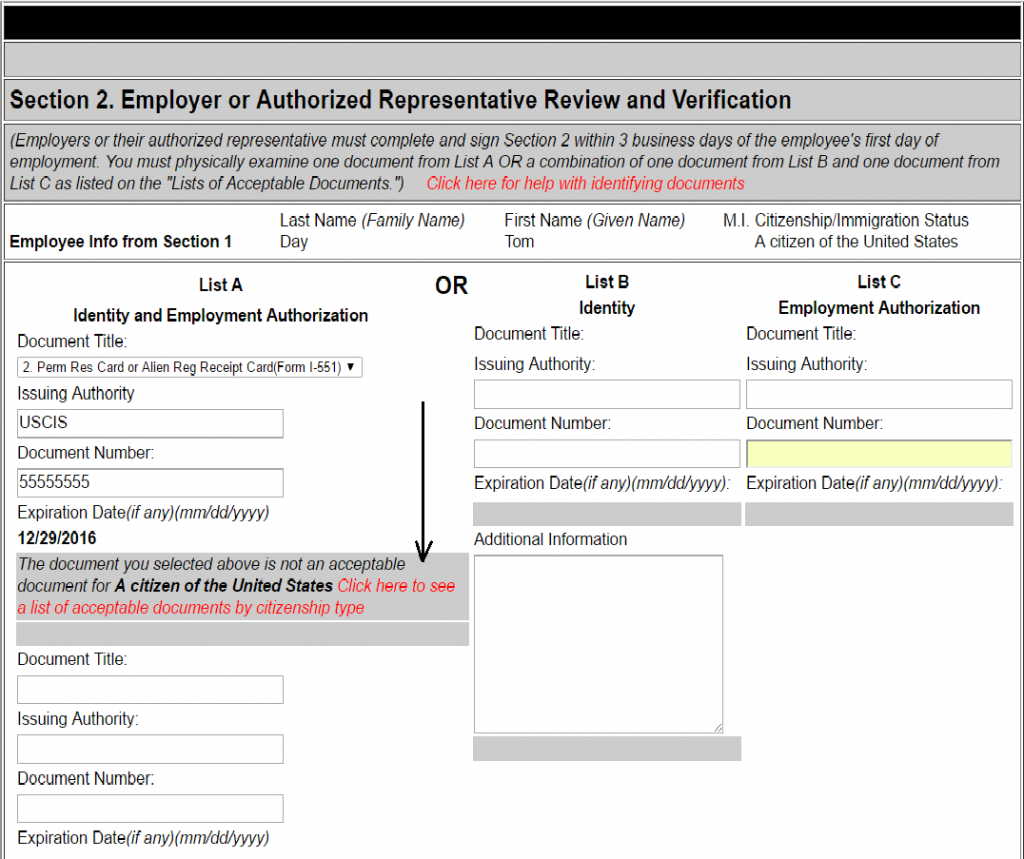
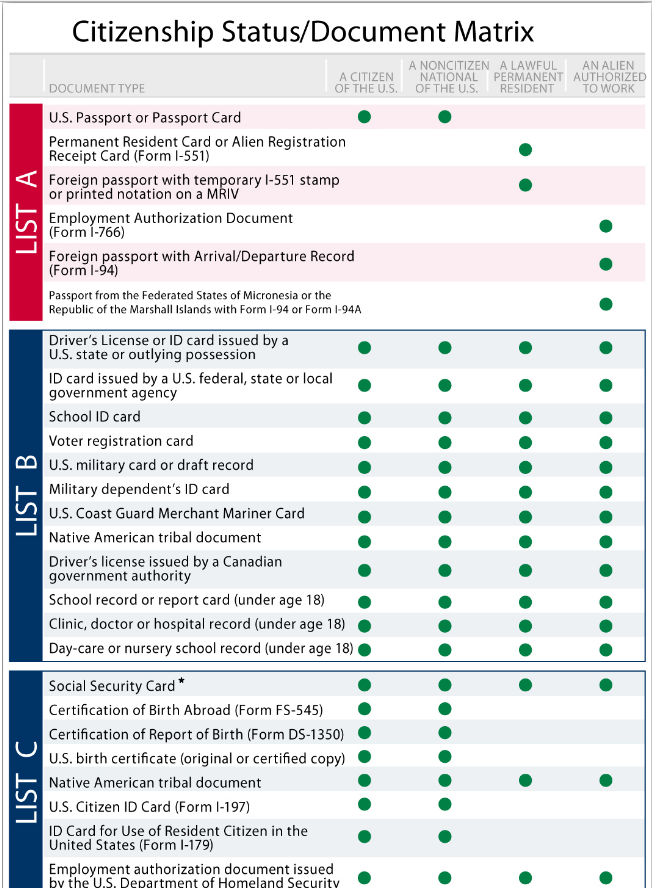
This message is alerting the manager that the List A document type is not an acceptable option based on the employee’s eligibility selection in Section 1. In the example, Tom stated he is a citizen of the United States, but in Section 2 the manager entered a Permanent Resident Card as the List A document. The highlighted link provides the manger feedback in regard to what List A documents are allowed with the various Section 1 selections. Below is the matrix that opens when you click on the above link.
The manager is presented with the following options at the bottom of the screen, this enables them to move forward:
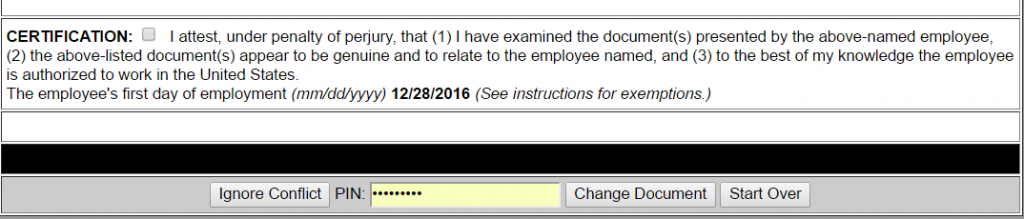
Legally, we have to allow the manager to move forward, even with the conflict. So they can enter their PIN, and then click on the Ignore Conflict button. This will move them forward to the actual I9. Ideally, the manager would click on the Change Document button, which will take them back to Section 2 without any fields populated; providing them the opportunity to enter the appropriate document type for the employee. The last option is for when the employee entered the wrong selection in Section 1, at which point they would need to click the Start Over button. This will close the tab/window and they would go back to My Task and open the New Hire task again, this time having the employee enter the correct selection in Section 1.
At this point, the I-9 is complete and ready to be digitally signed. The manager and new hire should review the document again; verify that the recorded information is accurate. If correct then they should select “Submit,” if it is incorrect they should close the window, go back to the New Hire task and start over.